DispatcherServlet and Spring Container
As mentioned, all incoming requests flow through a DispatcherServlet. Like any other Servlet in a Java EE application, we tell the Java EE container to load this Servlet at web app startup time via an in the web app's WEB-INF/web.xml. TheDispatcherServlet is also responsible for loading a Spring ApplicationContext that is used to perform wiring and dependency injection of managed component. On this basis, we specify some init parameters to the Servlet which configure the Application Context. Let's look at the config in web.xml:
WEB-INF/web.xml
01 | <?xml version="1.0" encoding="UTF-8"?> |
08 | <servlet-name>appServlet</servlet-name> |
09 | <servlet-class>org.springframework.web.servlet.DispatcherServlet</servlet-class> |
11 | <param-name>contextConfigLocation</param-name> |
12 | <param-value>/WEB-INF/spring/appServlet/servlet-context.xml</param-value> |
14 | <load-on-startup>1</load-on-startup> |
18 | <servlet-name>appServlet</servlet-name> |
19 | <url-pattern>/</url-pattern> |
A number of things are being done here:
- We register the DispatcherServlet as as a Servlet called
appServlet
- We map this Servlet to handle incoming requests (relative to the app path) starting with "/"
- We use the
ContextConfigLocation init parameter to customize the location for the base configuration XML file for the Spring Application Context that is loaded by the DispatcherServlet, instead of relying on the default location of<servletname>-context.xml).
Wait, What if Somebody Doesn't Want to Configure Spring via XML?
The default type of Application Context loaded by the DispatcheServlet expects to load at least on XML file with Spring bean definitions. As you'll see, we'll also enable Spring to load Java-based config, alongside the XML.
Everybody will have their own (sometimes very strong) opinion in this area, but while I generally prefer-Java based configuration, I do believe that smaller amounts of XML config for certain areas can sometimes still make more sense, for one of a number of reasons (e.g. ability to change config without recompilation, conciseness of XML namespaces, toolability, etc.). On this basis, this app will use the hybrid approach, supporting both Java and XML.
Rest assured that if you prefer a pure-Java approach, with no Spring XML at all, it's pretty trivial to achieve, by setting one init param in web.xml to override the default Application Context type and use a variant calledAnnotationConfigWebApplicationContext instead.
The Controller
Now let's create a minimal controller:
01 | package xyz.sample.baremvc; |
03 | import org.springframework.stereotype.Controller; |
04 | import org.springframework.web.bind.annotation.RequestMapping; |
07 | * Handles requests for the application home page. |
10 | public class HomeController { |
12 | @RequestMapping(value = "/") |
13 | public String home() { |
14 | System.out.println("HomeController: Passing through..."); |
15 | return "WEB-INF/views/home.jsp"; |
Let's walk through the key aspects of this class:
- The class has been annotated with the
@Controller annotation, indicating that this is a Spring MVC Controller capable of handling web requests. Because @Controller is a specialization of Spring's @Component Stereotype annotation, the class will automatically be detected by the Spring container as part of the container's component scanning process, creating a bean definition and allowing instances to be dependency injected like any other Spring-managed component.
- The
home method has been annotated with a @RequestMapping annotation, specifying that this method should handle web requests to the path "/", i.e. the home path for the application.
- The
home method simply logs a message to system out, and then returns WEB-INF/views/home.jsp, indicating the view which should handle the response, in this case a JSP page. (If hardcoding the entire view path including WEB-INF prefix, and the fact that it's a JSP, seems wrong to you, you are right. We'll deal with this later)
Now, we need to create the view. This JSP page will simply print a greeting.
WEB-INF/views/home.jsp
02 | <%@ page session="false" %> |
Finally, as previously mentioned, we need to create a minimal Spring Application Context definition file.
WEB-INF/spring/appServlet/servlet-context.xml
01 | <?xml version="1.0" encoding="UTF-8"?> |
15 | <context:component-scan base-package="xyz.sample.baremvc" /> |
18 | <mvc:annotation-driven /> |
Let's examine the contents of this file:
- You'll note that a few different Spring XML namespaces are being used: context, mvc, and the default beans
- The <context:component-scan> declaration ensures the Spring container does component scanning, so that any code annotated with
@Component subtypes such as @Controller is automatically discovered. You'll note that for efficiency, we limit (to xyz.sample.baremvc in this case) what part of the package space Spring should scan in the classpath
- The <mvc:annotation-driven> declaration sets up Spring MVC's support for routing requests to @Controllers, as well as how some things like conversion, formatting and validation are handled (with some sensible defaults based on what (libraries) is present in your classpath, and the ability to override if needed)
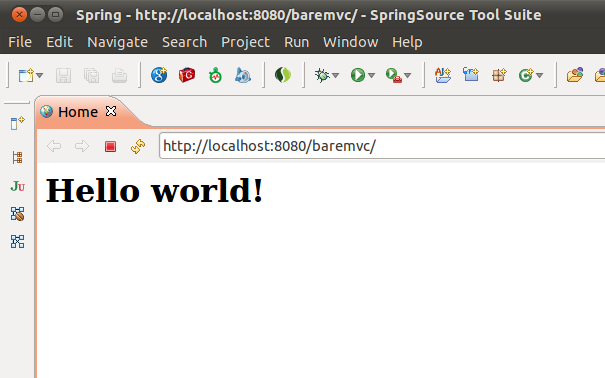
The web app is now ready to run. Assuming the Servlet container (tc Server in my case) is set to listen on localhost:8080, starting the application and then hitting the URL http://localhost:8080/baremvc via our browser results in a display of the expected greeting:

Let's walk through the major sequences and component interactions:
- When the web app starts up, the DispatcherServlet is loaded and initialized because of the entry in
web.xml.
- The DispatcherServlet loads an annotation-based Application Context, which has been configured to scan for annotated components via a regular expression specifying the base package(s).
- Annotated components such as the HomeController are detected by the container.
- The HTTP request to
http://localhost:8080/baremvc hits the servlet engine and is routed to our (baremvc) webapp.
- The implicit "/" path at the end of the URL matches the regex that has been registered for the DispatcherServlet, and the request is routed to it
- The DispatcherServlet needs to decide what to do with the request. It uses a strategy called a
HandlerAdapter to decide where to route the request. The specific HandlerAdapter type (or types, since they can be chained) to be used can be customized, but by default, an annotation-based strategy is used, which routes requests appropriately to specific methods in classes annotated as @Controller, based on matching criteria in @RequestMapping annotations found in those classes. In this case, the regex on the home method is matched, and it's called to handle the request.
- The home method does its work, in this case just printing something to system out. It then returns a string that's a hint (in this case, a very explicit one,
WEB-INF/views/home.jsp) to help chose the View to render the response.
- The DispatcherServlet again relies on a strategy, called a
ViewResolver to decide which View is responsible for rendering the response. This can be configured as needed for the application (in a simple or chained fashion), but by default, an InternalResourceViewResolver is used. This is a very simple view resolver that produces a JstlViewwhich simply delegates to the Servlet engine's internal RequestDispatcher to render, and is thus suitable for use with JSP pages or HTML pages.
- The Servlet engine renders the response via the specified JSP

 Posted in: Spring Framework